Essential Video Editing Workflow Steps for Success
Discover the key video editing workflow steps for smooth, professional projects. Improve efficiency and creativity with this easy guide for all creators.
Essential Video Editing Workflow Steps for Success

Video editing is more than just piecing clips together and calling it a day. Professional editors rely on structure, and over 70 percent of production time is spent organizing, logging, and backing up footage before a single timeline cut is made. Most would assume the magic happens in the editing software itself. What really sets professionals apart is their behind-the-scenes workflow mastery—and that’s exactly how raw footage turns into a polished story.
Table of Contents
- Planning And Organizing Your Footage
- Efficient Editing Techniques For Better Flow
- Enhancing Videos With Effects And Sound
- Exporting And Delivering Final Projects
Quick Summary
| Takeaway | Explanation |
|---|---|
| Organize Your Footage Systematically | Develop a structured file management system to categorize footage, audio, graphics, and exports effectively. This saves time during editing and prevents confusion. |
| Implement Comprehensive Content Logging | Maintain detailed logs for your recordings, including key data like file names and content descriptions, helping streamline navigation in your editing workflow. |
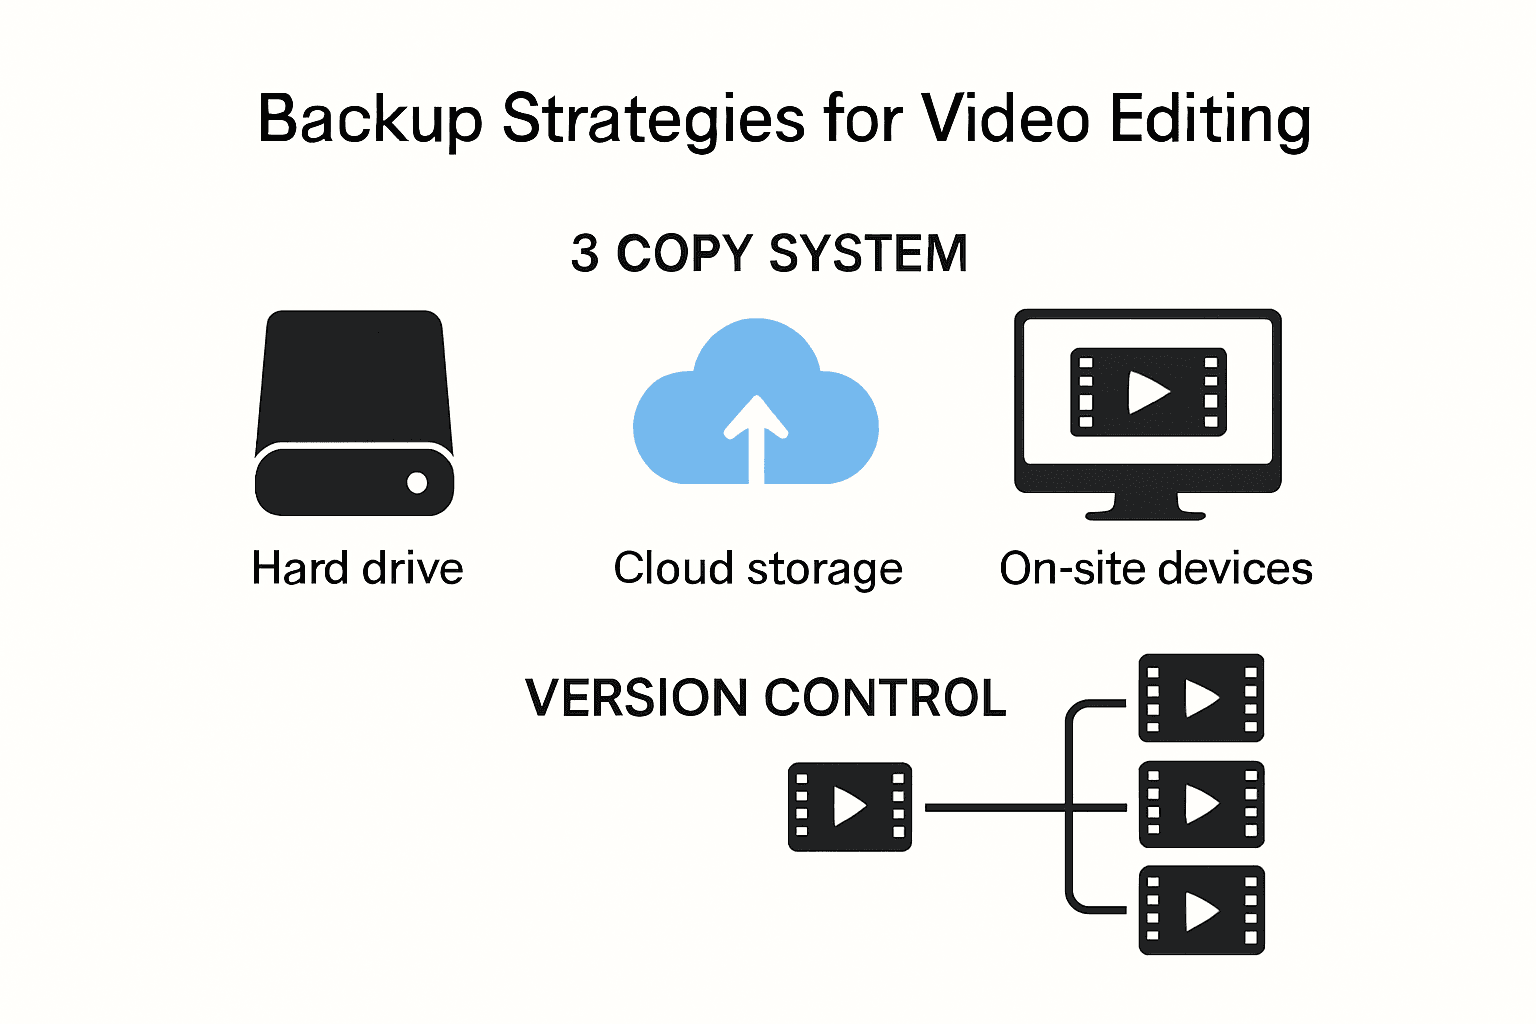
| Create a Backup Strategy | Use multiple backups—local, offsite, and cloud-based—to safeguard your project files and maintain version control, reducing risk of data loss during editing. |
| Focus on Seamless Narrative Transitions | Use techniques such as match cuts and sound bridges to create smooth transitions that enhance storytelling and keep viewers engaged throughout the video. |
| Test Export Quality Across Devices | Check the exported video on various platforms and devices to ensure quality, synchronization, and file integrity before final delivery to viewers. |
Planning and Organizing Your Footage
Effective video editing begins long before you touch the first edit control. The preparation and organization of your footage form the critical foundation that determines the efficiency and quality of your entire post-production workflow. Without a strategic approach to managing your raw materials, even the most talented editors can find themselves lost in a chaotic sea of digital files.
Creating a Systematic File Management Strategy
A robust file management system is the backbone of a smooth video editing process. According to the Georgia Institute of Technology, professional video creators should implement a structured folder organization approach. Start by creating dedicated folders for different asset types:
- Footage: Primary video clips
- Audio: Sound recordings and music tracks
- Graphics: Title cards, lower thirds, overlays
- Sequences: Edited project timelines
- Exports: Final rendered video files
- Other: Miscellaneous supporting materials
This systematic categorization prevents file confusion and significantly reduces time spent searching for specific assets during the editing process.
To simplify and visualize an effective file management approach for video editing, here’s a summary table outlining recommended folder structures and the types of assets that go into each:
| Folder Name | Asset Type | Examples / Purpose |
|---|---|---|
| Footage | Primary video clips | Raw camera files, screen recordings |
| Audio | Sound recordings and music | Voiceovers, background music, SFX |
| Graphics | Titles, overlays, images | Lower thirds, logos, animations |
| Sequences | Edited project timelines | Project files, sequence backups |
| Exports | Final rendered video files | Master outputs, versions for clients |
| Other | Miscellaneous materials | Reference docs, scripts, production notes |
This organized folder hierarchy ensures quick asset retrieval and reduces confusion during editing.
Consistent naming conventions are equally crucial. Use clear, descriptive file names that include date, scene, or content type to make identification instantaneous.
Content Logging and Metadata Management
Research from the National Center for Biotechnology Information emphasizes the critical role of comprehensive content logging in postproduction workflows. Professional video editors develop detailed logs that catalog recordings with precise information. A well-constructed log typically includes:
- Filename
- Recording date
- Location
- Brief content description
- Specific notes about usable segments
- Technical specifications (resolution, frame rate)
This meticulous approach transforms raw footage from an unorganized collection of clips into a structured resource that can be quickly and efficiently navigated. Metadata management tools within professional editing software can further streamline this process, allowing for quick searches and intelligent asset organization.
Backup and Version Control
Protecting your valuable footage requires a multi-layered backup strategy. Create at least three copies of your project files: one working copy, one local backup, and one offsite or cloud-based backup. Use external hard drives with sufficient storage capacity and consider professional cloud storage solutions designed for video production.
Implement a version control system where each significant edit or revision is saved as a separate project file. This practice allows you to track project evolution and revert to previous versions if needed. Consistent backup and versioning prevent potential catastrophic data loss and provide a safety net during complex editing projects.
By investing time in comprehensive planning and organization, you transform your video editing workflow from a potentially stressful experience into a structured, efficient process. Remember that good organization is not just about file management—it's about creating a workflow that allows your creativity to flourish without technical obstacles.
Efficient Editing Techniques for Better Flow
Transforming raw footage into a compelling narrative requires more than technical skills—it demands a strategic approach to editing that maintains viewer engagement and storytelling momentum. Professional video editors understand that smooth transitions, precise timing, and intentional sequence design are fundamental to creating videos that captivate audiences from start to finish.
Establishing Optimal Project Settings
The Georgia Institute of Technology recommends establishing precise project settings before diving into editing. Selecting the appropriate resolution and frame rate forms the technical foundation of your project. Standard professional formats include:
- HD resolution (1920 x 1080) at 30 frames per second
- HD resolution at 24 frames per second for a more cinematic feel
- 4K resolution (3840 x 2160) for high-end productions
Additionally, configuring scratch disks on fast external or internal drives prevents performance bottlenecks during complex editing processes. These preparatory steps ensure your editing environment is optimized for efficiency and quality output.
Creating Seamless Narrative Transitions
Seamless editing is about more than technical precision—it's about storytelling rhythm. Professional editors focus on creating smooth transitions that guide viewers through the narrative without jarring interruptions. This involves carefully analyzing footage for natural cut points, matching movement and energy between shots, and using transition techniques that enhance rather than distract from the story.
Key transition strategies include:
- Match Cuts: Connecting scenes through similar visual elements or movements
- Motivational Cuts: Transitioning based on character actions or narrative progression
- Sound Bridge: Using continuous audio to connect visually different scenes
Here’s a table summarizing key transition techniques used by professional video editors to ensure seamless narrative flow, along with their descriptions and intended effects:
| Transition Technique | Description | Intended Effect |
|---|---|---|
| Match Cut | Cuts between similar visuals or movements | Smooth, visually connected story |
| Motivational Cut | Cut driven by action or narrative movement | Advances plot or character action |
| Sound Bridge | Uses continuous audio across two scenes | Fluid scene change, maintains pace |
This comparison highlights how each editing transition technique enhances storytelling and keeps viewers engaged.
Optimizing Workflow with Editing Software Techniques
The University of Kentucky emphasizes the importance of a well-organized project structure before importing files. Developing a systematic approach to your editing workflow can dramatically improve efficiency. This includes:
- Utilizing keyboard shortcuts to speed up repetitive tasks
- Creating and using custom presets for color grading and effects
- Implementing multicam editing for complex sequence management
- Regularly saving project versions to prevent potential data loss
Mastering these techniques transforms video editing from a technical process into an art form. By combining technical proficiency with creative storytelling, editors can craft videos that not only communicate information but also create emotional connections with viewers. Remember that great editing is often invisible—the best edits are those that feel natural and keep audiences fully immersed in the story.
Enhancing Videos with Effects and Sound
Video editing transcends mere technical assembly of clips. The strategic application of visual effects and sound design transforms raw footage into a compelling narrative experience that captures and maintains audience attention. Professional editors understand that thoughtful audio and visual enhancements can dramatically elevate the emotional impact and storytelling power of a video.
Strategic Visual Effects Implementation
Research from the National Center for Biotechnology Information highlights the importance of using visual elements purposefully during postproduction. Effects should not merely decorate the video but enhance its core message and narrative flow. Consider these strategic approaches:
- Transition Effects: Create smooth scene shifts that maintain narrative momentum
- Color Grading: Establish mood and visual consistency across different shots
- Graphic Overlays: Add informational context or emphasize key points
- Motion Graphics: Introduce dynamic visual elements that support storytelling
The key is subtlety. Overusing effects can distract viewers and diminish the video's professional quality. Each visual enhancement should serve a specific communicative purpose, whether highlighting emotional tone, providing additional information, or guiding viewer attention.
Audio Design and Sound Engineering
The Georgia Institute of Technology emphasizes audio as a critical component of video production. Professional sound design involves more than just balancing volume levels. It requires a nuanced approach to creating an immersive auditory experience:
- Clean dialogue tracks using noise reduction tools
- Balance background music without overpowering spoken content
- Add sound effects that enhance visual storytelling
- Use audio transitions to smooth scene changes
The Essential Sound panel in professional editing software provides powerful tools for audio refinement. Editors can adjust dialogue clarity, reduce background noise, and create a balanced sound profile that supports the video's emotional narrative.
Accessibility and Multimedia Learning
Modern video production extends beyond visual and auditory aesthetics to include accessibility. The National Center for Biotechnology Information recommends incorporating captions and considering multimedia learning principles. This approach ensures that videos communicate effectively across diverse audience needs:
- Add accurate closed captions for hearing-impaired viewers
- Include subtitle options in multiple languages
- Ensure audio descriptions for visually complex scenes
- Design visual and audio elements that reinforce key messages
By treating effects and sound as integral storytelling tools rather than decorative elements, editors can create videos that are not just watched but experienced. The most memorable videos seamlessly blend technical precision with creative storytelling, using every audiovisual element to engage and communicate with the audience.
Exporting and Delivering Final Projects
The final stage of video production involves more than simply clicking an export button. Successful project delivery requires strategic decision-making about file formats, platform compatibility, and quality preservation. Professional video creators understand that the export process is a critical step that can significantly impact the viewer's experience.
Selecting Optimal Export Settings
The Georgia Institute of Technology provides comprehensive guidance on export strategies. Different platforms demand specific export configurations. For online video platforms like YouTube and Vimeo, the recommended approach includes:
- Using H.264 format for web compatibility
- Selecting the 'YouTube 1080p Full HD' preset
- Maintaining high-quality resolution settings
- Creating descriptive file names (e.g., 'Project_Name_Final_1080p.mp4')
For professional archival or high-end production needs, consider advanced formats like Apple ProRes or DNxHD. These formats preserve more visual information and provide greater flexibility for future editing or color grading.
File Organization and Delivery Preparation
California State University, Northridge emphasizes the importance of systematic file management during export. Before final delivery, create a dedicated project folder with structured subfolders:
- Raw footage archives
- Audio recordings
- Music files
- Supporting graphics
- Final exported versions
This organizational approach ensures smooth file referencing and provides a comprehensive backup of your entire project. Proper file management prevents potential linking issues and simplifies future project modifications or client revisions.
Quality Assurance and Multi-Platform Testing
A LinkedIn industry guide recommends rigorous testing before final delivery. Professional video creators should:
- Preview the entire exported video within editing software
- Check for potential rendering artifacts
- Verify audio synchronization
- Test video playback across multiple devices (computers, smartphones, tablets)
- Confirm color consistency and quality
For larger projects, export a short test segment first to identify potential technical issues. This approach allows for precise adjustments before committing to a full-project export.
Successful video delivery is a nuanced process that combines technical precision with strategic planning. By understanding export requirements, maintaining organized workflows, and conducting thorough quality checks, video creators can ensure their final product meets professional standards and delivers an exceptional viewing experience across various platforms and devices.
Frequently Asked Questions
What are the essential steps in a video editing workflow?
A successful video editing workflow includes planning and organizing footage, implementing efficient editing techniques, enhancing videos with effects and sound, and exporting and delivering final projects. These steps ensure a systematic approach to video creation, maximizing efficiency and quality.
Why is file management important in video editing?
File management is crucial because it organizes assets systematically, making it easy to locate and retrieve footage, audio, and graphics during editing. A structured file organization reduces confusion and saves time, allowing editors to focus on creative storytelling rather than searching for files.
How can I ensure seamless transitions in my video edits?
To create seamless transitions, focus on using techniques like match cuts, motivational cuts, and sound bridges. Analyze footage for natural cut points, match movements between shots, and maintain audio continuity to enhance the storytelling flow and keep viewers engaged.
What export settings should I use for online platforms like YouTube?
For online platforms like YouTube, use the H.264 format with the 'YouTube 1080p Full HD' preset. Maintain high-quality resolution settings and create descriptive file names to ensure compatibility and easy identification during uploads.
Streamline Your Video Editing Workflow With AI-Powered Solutions
Struggling to keep your footage organized and your projects on track? Many editors face the pain of tangled file structures, tedious content logging, and the pressure to deliver polished videos on tight deadlines. The article you just explored breaks down the critical steps needed for efficient video editing, from systematic file management to smart export strategies. But what if you could automate these processes and focus completely on your story?
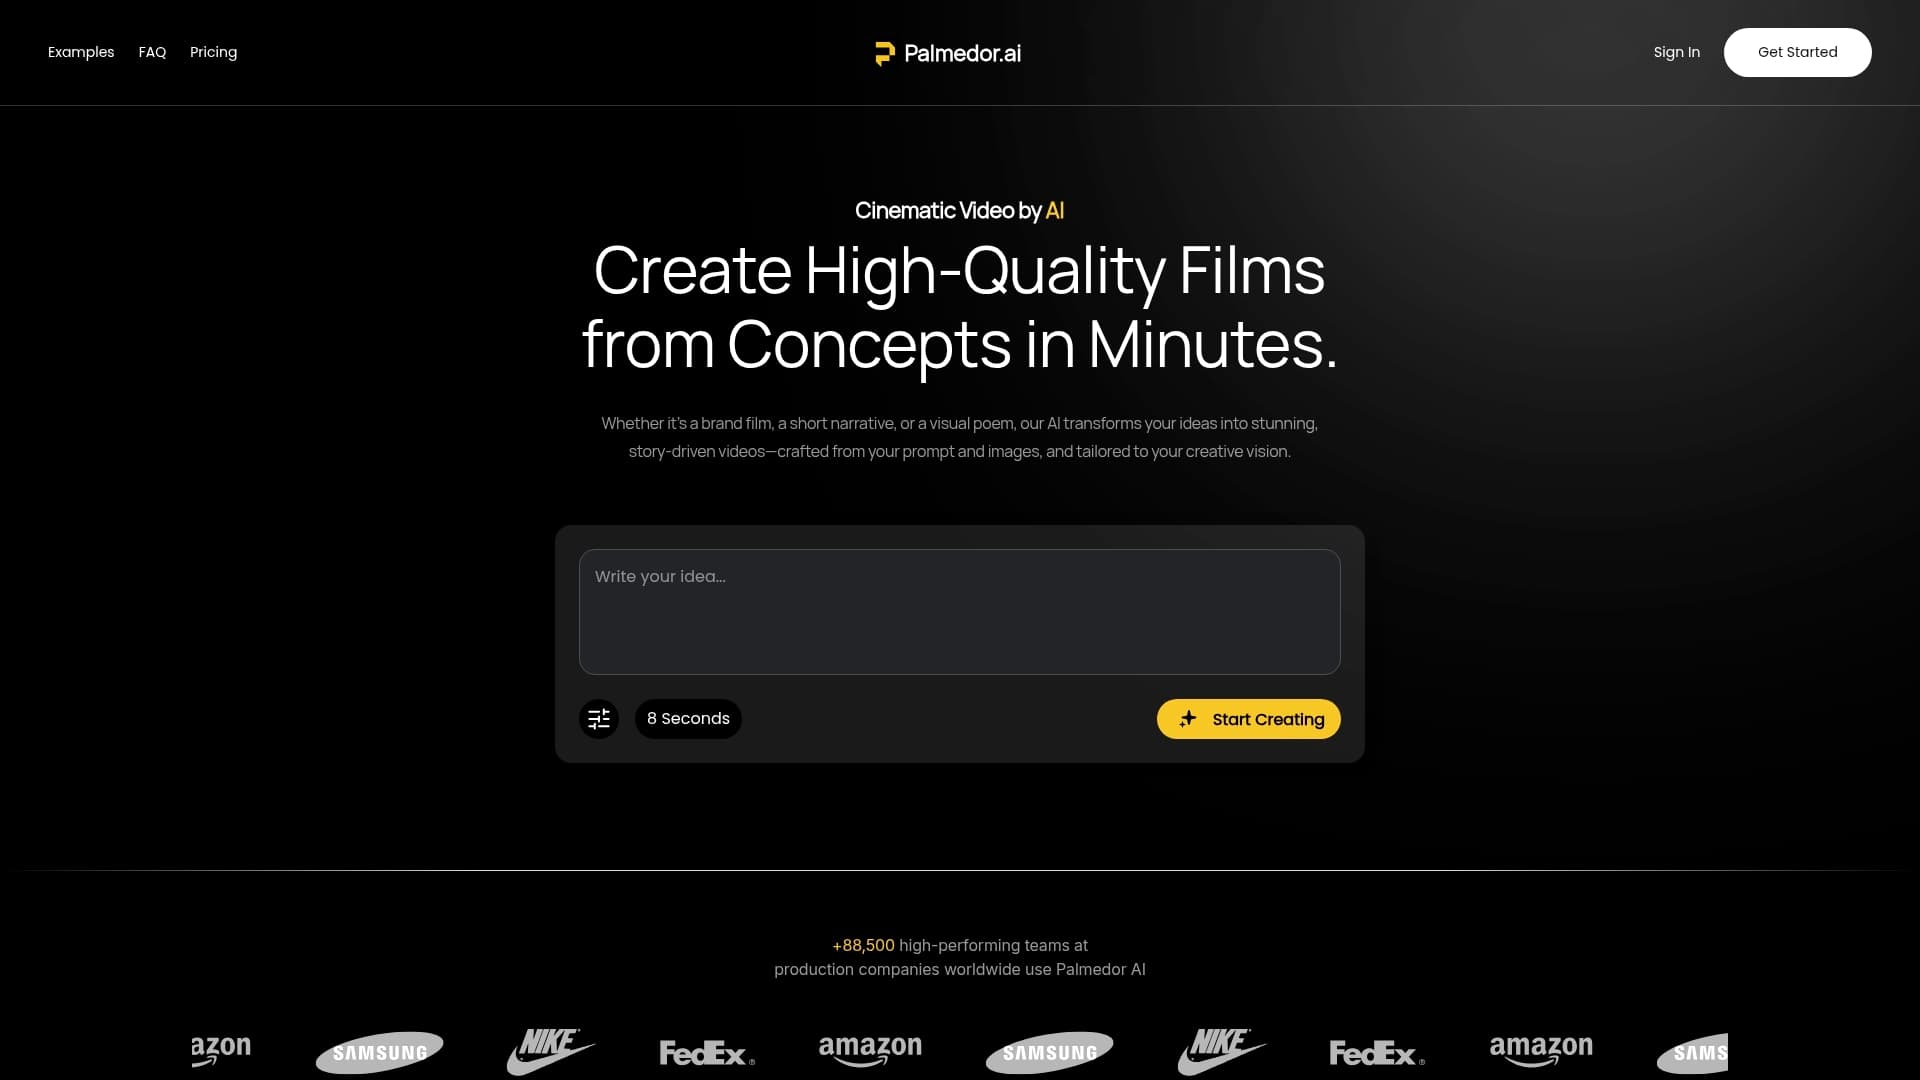
Experience a new level of efficiency with Palmedor.ai. Our platform transforms your ideas into fully edited, cinematic videos with minimal manual effort. Just describe your vision or upload your images and let our AI handle script creation, scene management, and smart presets. No more getting lost in endless folders or metadata logs. Visit Palmedor.ai to discover how easy professional editing can be. Take the next step right now and accelerate your creative projects with the power of automation.