Master Video Editing for Beginners: Create Stunning Edits
Unlock your video editing skills with our step-by-step guide for beginners. Learn to create stunning edits from start to finish!
Master Video Editing for Beginners: Create Stunning Edits

Learning video editing might sound overwhelming at first but it is more approachable than many expect. Over 80 percent of beginners pick up the basics using free software like DaVinci Resolve that delivers professional tools with zero upfront cost. The real surprise Most new editors struggle not because of complex software but because they miss key workflow steps that make editing easy and fun. So if you thought you had to invest hundreds or be a tech wizard to start editing impactful videos think again.
Table of Contents
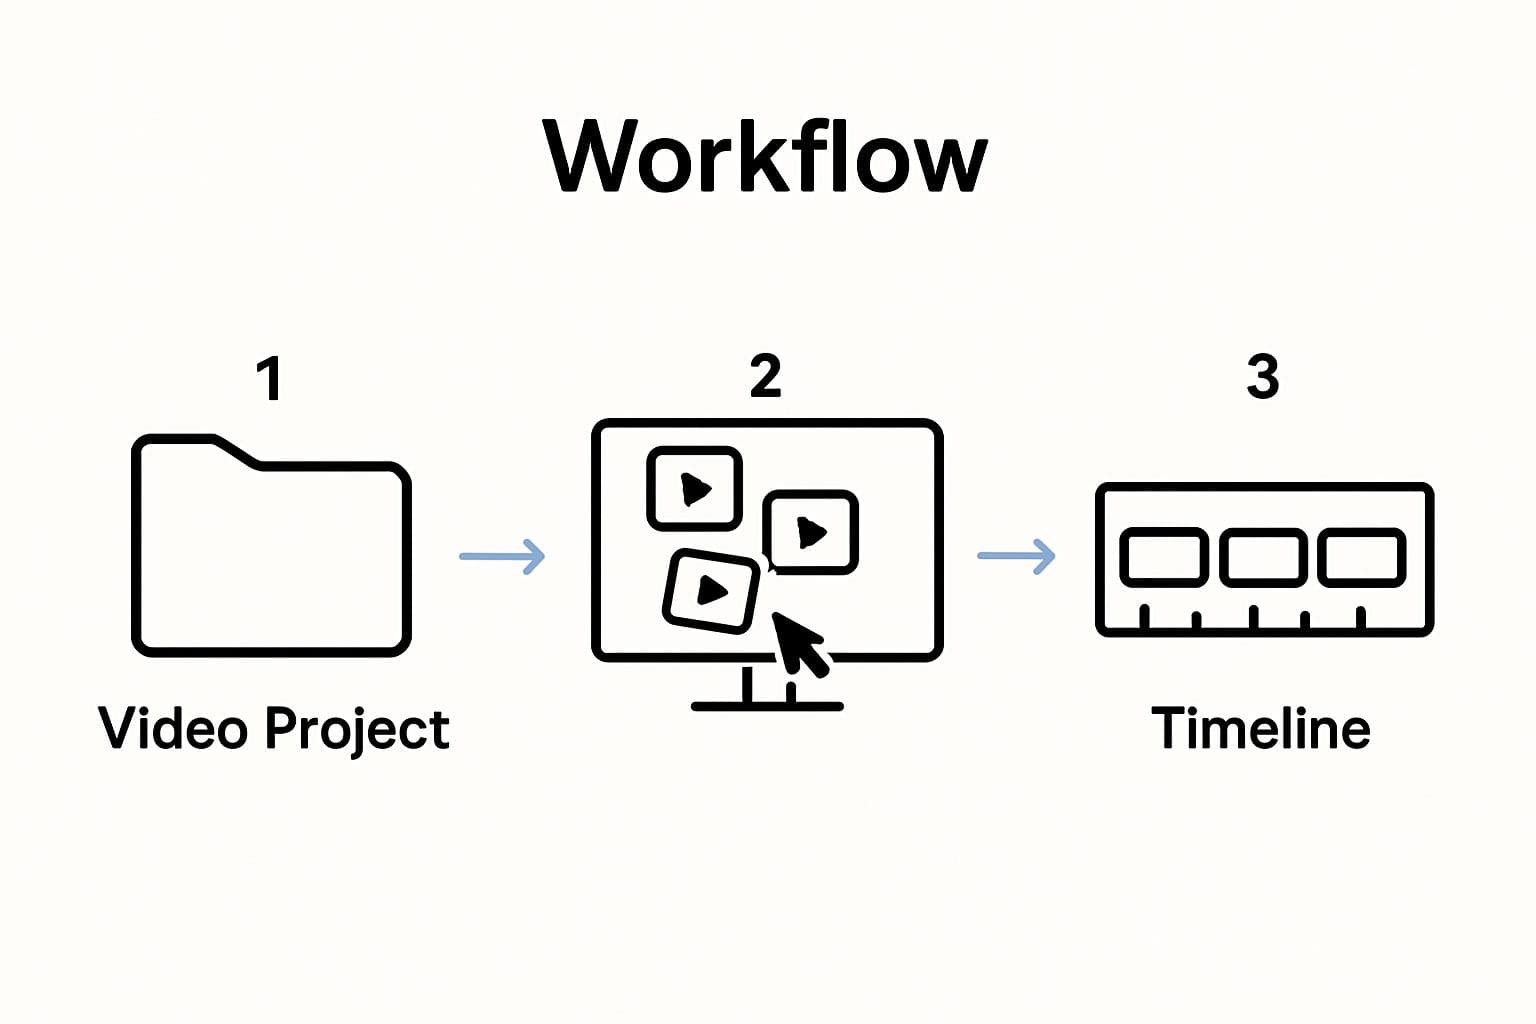
- Step 1: Choose Your Video Editing Software
- Step 2: Import and Organize Your Video Clips
- Step 3: Trim and Arrange Your Clips on the Timeline
- Step 4: Add Transitions and Effects to Enhance Your Video
- Step 5: Incorporate Music and Sound Effects for Audio Depth
- Step 6: Export Your Final Project in the Desired Format
Quick Summary
| Key Point | Explanation |
|---|---|
| 1. Choose beginner-friendly software | Select software that balances user-friendliness with powerful features, such as DaVinci Resolve or iMovie, to start your editing journey positively. |
| 2. Organize your project effectively | Create a dedicated folder structure for your media files, clearly labeling them to enhance your editing workflow and avoid confusion. |
| 3. Master timeline editing techniques | Learn to trim and arrange clips forbetter narrative flow, focusing on emotional pacing and maintaining viewer engagement throughout your video. |
| 4. Use transitions and effects wisely | Apply subtle transitions and effects that support your storytelling, ensuring they enhance the flow rather than distract from the content. |
| 5. Optimize audio for emotional impact | Carefully integrate background music and sound effects to elevate the emotional depth of your video while ensuring clarity in dialogue and main audio. |
Step 1: Choose Your Video Editing Software
Starting your journey in video editing for beginners requires selecting the right software that matches your skill level and creative goals. The software you choose will be your primary tool for transforming raw footage into compelling visual stories, so making an informed decision is crucial.
For newcomers to video editing, the market offers an impressive range of options that cater to different experience levels and budgets. Free software like DaVinci Resolve provides professional grade editing tools without initial financial investment. This platform allows beginners to experiment with advanced features while learning fundamental editing techniques.
When evaluating video editing software, consider several key factors that will impact your learning experience. Processing power requirements, user interface complexity, available tutorials, and compatibility with your computer's operating system are critical considerations. Windows and Mac users have slightly different software recommendations, so understanding your specific system limitations helps narrow down choices.
Professional recommendations suggest starting with intuitive platforms that offer comprehensive learning resources. Adobe Premiere Pro remains a popular choice for those wanting a robust, industry standard tool with extensive online tutorials. However, beginners might find its interface initially overwhelming. Alternatives like iMovie for Mac users or Filmora offer more beginner friendly interfaces that still deliver impressive editing capabilities.
Before committing to any software, take advantage of free trials and explore tutorial videos demonstrating each platform's workflow.
Below is a comparison table of popular beginner video editing software mentioned in the guide to help readers select the most appropriate option for their needs.
| Software | Platform | Cost | Learning Curve | Notable Features |
|---|---|---|---|---|
| DaVinci Resolve | Windows/Mac | Free | Moderate | Professional tools, advanced color grading |
| iMovie | Mac | Free | Easy | Intuitive interface, quick editing |
| Filmora | Windows/Mac | Freemium | Easy | User-friendly, preset effects |
| Adobe Premiere Pro | Windows/Mac | Paid (Trial) | Moderate/Complex | Industry standard, extensive tutorials |
| Many software providers offer guided walkthroughs that can help you understand the basic mechanics of video editing. Pay attention to how comfortable you feel navigating the interface and executing fundamental editing tasks like trimming clips, adding transitions, and adjusting audio levels. |
Ultimately, the best video editing software for beginners is one that balances powerful features with an approachable learning curve. Start with a tool that doesn't intimidate you but still provides room for growth as your skills improve. Remember, mastering video editing is a gradual process, and your first software choice is just the beginning of an exciting creative journey.
Step 2: Import and Organize Your Video Clips
Importing and organizing video clips is a critical foundation for smooth video editing workflows. This step transforms raw footage from scattered files into a structured project that enables efficient and creative editing. Professional video editors understand that good organization saves significant time during the post production process.
Begin by creating a dedicated project folder on your computer where you will centralize all related media files. Within this folder, establish subfolders for different types of content such as original footage, audio tracks, graphics, and exported drafts. Consistent folder naming conventions prevent confusion and make file retrieval simple. For instance, use formats like "ProjectName_Date_Version" to keep your files systematically labeled.
Most video editing software provides straightforward import mechanisms. Professional media management research suggests creating a consistent workflow for transferring files from cameras or smartphones directly into your editing platform. Connect your recording device or memory card, then use the import function within your chosen software to transfer video clips. Many programs automatically generate thumbnails and metadata previews, helping you quickly identify specific footage.
Once imported, arrange your clips in a logical sequence that reflects your intended narrative or project structure. Utilize your editing software's bin or timeline features to group related clips together. Some advanced editing platforms allow color coding or star rating systems that help quickly identify high quality or preferred shots. Pay close attention to file formats and resolution to ensure compatibility and maintain video quality throughout your editing process.
Verify your import by checking that all intended clips are present, readable, and maintaining their original quality. Watch a few seconds of each clip to confirm proper transfer and preview potential editing options. If any files appear corrupted or fail to import correctly, re-transfer them from the original source to prevent potential project complications.
By dedicating time to methodical clip organization upfront, you create a solid foundation for efficient and creative video editing.
Your future self will appreciate the structured approach that allows smoother navigation and faster project completion.
Step 3: Trim and Arrange Your Clips on the Timeline
The timeline represents the visual storytelling canvas where your video narrative comes to life. Trimming and arranging clips is an essential skill that transforms raw footage into a coherent, engaging visual experience. Mastering the timeline allows you to control the pacing, rhythm, and emotional flow of your video.
Begin by understanding your editing software's timeline interface. Most platforms use a horizontal track where video and audio clips can be precisely positioned and manipulated. Zoom in on your timeline for pixel perfect editing, which enables you to make incredibly precise cuts and adjustments. Look for tools like razor or slice tools that allow you to split clips at exact moments.
Professional editing techniques emphasize the importance of removing unnecessary footage. Start by identifying the strongest segments of each clip that contribute to your overall narrative. Use the trim tools to remove unnecessary frames at the beginning and end of your clips, creating tighter, more focused sequences. Pay attention to the natural rhythm and flow of your content, ensuring each clip transitions smoothly into the next.
Arranging clips requires strategic thinking about storytelling and visual continuity. Consider the emotional progression of your video when placing clips on the timeline. Some editing software allows you to color code or label clips, which can help you visualize the overall structure of your project. Experiment with different clip orders to find the most compelling narrative sequence.
As you arrange clips, be mindful of audio synchronization and potential gaps between segments. Most professional editing platforms offer magnetic timeline features that help clips snap together seamlessly. Use the ripple edit and roll edit tools to make precise adjustments without disrupting the overall timing of your project.
Verify your edit by playing through the entire sequence multiple times. Watch for jarring transitions, awkward pacing, or moments that disrupt the narrative flow. A good edit should feel natural and maintain viewer engagement.
 Take breaks between review sessions to maintain a fresh perspective on your work. Remember that editing is an iterative process, and your first arrangement is rarely the final version.
Step 4: Add Transitions and Effects to Enhance Your Video
Transitions and effects are the secret ingredients that transform a basic video compilation into a polished, professional visual story. These creative tools help guide viewers through your narrative while adding visual interest and emotional depth. Approach this step as an opportunity to elevate your raw footage from simple documentation to compelling storytelling.
Begin by exploring the default transition options in your editing software. Most platforms offer standard transitions like dissolves, fades, and wipes. Subtle transitions work best for maintaining narrative flow, so avoid overly dramatic effects that distract from your content. A gentle cross dissolve can smoothly connect scenes, while a quick cut works well for more dynamic storytelling moments.
Cinematic editing techniques suggest using effects strategically and sparingly. Each transition should serve a narrative purpose rather than simply looking impressive. Consider the emotional tone of your video when selecting effects. For instance, a soft fade might suit emotional documentary footage, while quick cuts work better for high energy promotional content.
Explore your software's effect libraries to add visual enhancements that complement your storytelling. Color grading tools can dramatically transform the mood of your video, allowing you to create consistent visual themes or highlight specific emotional moments. Experiment with brightness, contrast, saturation, and color temperature to develop a unique visual style. Some editing platforms offer preset color looks that can instantly elevate your video's professional appearance.
Audio transitions are equally important but often overlooked by beginners. Smooth audio crossfades between clips prevent jarring sound changes and create a more polished listening experience. Pay attention to audio levels and use gentle fade ins and fade outs to create seamless sound transitions.
Verify your effects by watching your entire video multiple times from different perspectives. Ask yourself whether each transition and effect genuinely improves the viewing experience or feels unnecessary. The best editing enhances storytelling without drawing attention to itself. A great edit should feel invisible, allowing viewers to remain fully immersed in your video's narrative.
Step 5: Incorporate Music and Sound Effects for Audio Depth
Audio transforms a visual experience from merely watching to truly feeling. Music and sound effects are powerful storytelling tools that can dramatically enhance emotional engagement and narrative impact. This step involves carefully selecting and integrating audio elements that complement your video's visual narrative without overwhelming the primary content.
Begin by understanding audio layer principles in your editing software. Most platforms allow multiple audio tracks, enabling you to blend background music, sound effects, and original video audio seamlessly. Maintain a strategic audio hierarchy where dialogue and primary sound remain prominent. When adding background music, ensure it supports rather than competes with your main audio content.
Professional sound design research emphasizes the importance of audio levels and balance. Use your software's audio mixing tools to adjust volume levels precisely. Background music should typically sit around 15-20% lower than primary audio tracks. This technique ensures viewers can hear dialogue clearly while still experiencing the emotional undertone provided by musical accompaniment.
Sound effects can add remarkable depth to your video. Consider subtle ambient sounds that enhance scene authenticity. For instance, a quiet background of urban noise in a city scene or gentle nature sounds in an outdoor sequence can create immersive viewing experiences. Royalty free music and sound effect libraries offer extensive collections for various project types, allowing you to find perfect audio matches without copyright complications.
When selecting music, consider the emotional trajectory of your video. Upbeat tracks work well for energetic content, while minimalist instrumental pieces suit more reflective narratives. Pay attention to music tempo, ensuring it matches your video's pacing. Abrupt musical shifts can disrupt viewer engagement, so use crossfades and careful editing to create smooth audio transitions.
Verify your audio integration by listening to your video with eyes closed. This technique helps you assess whether the audio truly supports your narrative. Good audio design should feel natural and enhance storytelling without drawing unnecessary attention to itself. Make incremental adjustments, listening carefully to maintain a balanced, professional sound profile that elevates your visual content.
Step 6: Export Your Final Project in the Desired Format
Exporting your video is the culminating moment where your creative vision transforms from a project file into a shareable digital product. This final step determines how your video will look and perform across different platforms and devices, making it crucial to understand export settings and format requirements.
Start by identifying the primary platforms where your video will be viewed. Different platforms have specific video format and quality recommendations. YouTube, social media channels, and professional websites each have unique optimal settings. Resolution and file size become critical considerations during export. Higher resolution videos provide better quality but require more storage and bandwidth, while compressed files ensure faster loading and smoother streaming.
Digital video compression techniques suggest selecting appropriate codecs and file formats based on your distribution goals. MP4 with H.264 compression remains a universal format compatible with most devices and platforms. For professional video production, consider formats like ProRes for higher quality preservation, especially if further editing might be required.
Your editing software will typically offer preset export options tailored to specific platforms. These presets automatically configure resolution, bitrate, and other technical parameters. Professional creators recommend creating multiple export versions to accommodate different viewing environments. A high resolution version for professional screening, a medium resolution for web streaming, and a compressed version for mobile devices ensures maximum accessibility.
Pay close attention to audio settings during export. Ensure your audio remains synchronized and maintains the quality achieved during editing. Most professional export settings allow you to adjust audio bitrate and channels to optimize sound performance. Stereo configurations work well for most online content, while surround sound might be preferable for cinematic projects.
Verify your exported video by playing it on multiple devices and platforms. Check for any quality loss, audio synchronization issues, or unexpected rendering artifacts. A successful export maintains the visual and audio integrity of your original project while being optimized for intended viewing platforms.
Use this checklist table to ensure your video export settings and project files are ready for sharing and optimal performance on your desired platforms.
| Verification Step | What to Check | Why It Matters |
|---|---|---|
| Correct Export Format | MP4 for web, ProRes for pro use, etc. | Platform compatibility, quality retention |
| Proper Resolution/Bitrate | Matches destination (e.g., 1080p for YouTube) | Visual clarity, optimized loading |
| Audio Quality/Synchronization | No lag, clear audio output | Professional finish, viewer experience |
| File Size | Fits platform/upload requirements | Ease of sharing, platform restrictions |
| Multiple Device Test | Play export on phone, computer, web | Detects rendering issues, compatibility |
| Remember that exporting is an art form itself, requiring careful balance between file size, visual quality, and platform compatibility. |
Ready to Turn Video Editing Headaches into Easy Wins?
Getting started with video editing can feel overwhelming, especially when you face issues like complicated software, tedious clip organization, and confusing export settings. If you crave a simpler way to turn your ideas into stunning edits without endless tutorials or frustrating learning curves, you're not alone. The article highlights challenges such as selecting the right editing tool, managing media files, and achieving a professional finish. What if you could skip the hardest steps and jump straight into bringing your vision to life?

Let Palmedor.ai dramatically streamline your creative workflow. Transform any concept or reference image into cinematic, professional videos using powerful AI. No advanced skills needed. From script generation and scene management to intelligent presets and output in any format, you control your story while the platform handles the technical details. Explore inspirational success stories and straightforward pricing on the home page, and discover step-by-step guidance in our FAQ and Blog. Start your effortless video journey today and see how easy professional results can be.
Frequently Asked Questions
What video editing software is best for beginners?
Choosing the right video editing software depends on your skill level and needs. For beginners, free options like DaVinci Resolve or user-friendly platforms like iMovie and Filmora are excellent choices, providing robust features without overwhelming complexity.
How can I organize my video clips for efficient editing?
Start by creating a dedicated project folder on your computer and organizing clips into subfolders based on type, such as original footage, audio tracks, and graphics. Consistent naming conventions will make file retrieval simpler and help streamline your editing process.
What are effective techniques for trimming and arranging clips?
Trimming involves cutting unnecessary footage from the start and end of clips to create tighter sequences. Arrange your clips on the timeline based on the emotional narrative you wish to convey, ensuring smooth transitions and pacing to maintain viewer engagement.
How do I enhance my video with transitions and effects?
Use transitions like fades and dissolves sparingly to maintain narrative flow. Explore your software's effects library for color grading options that enhance visual storytelling. Incorporate sound effects and background music to elevate emotional engagement and improve the overall viewing experience.