How to Create Moodboards: A Step-by-Step Guide for Creatives
Learn how to create moodboards effectively with this step-by-step guide, designed for video creators and marketing teams to visualize ideas.
How to Create Moodboards: A Step-by-Step Guide for Creatives
Moodboards are the creative backbone behind every memorable brand, film, or design project. But even with millions of images at our fingertips, most moodboards end up feeling scattered or generic. The real secret? A single intentional theme statement can transform a pile of random visuals into a moodboard that communicates your vision instantly and powerfully.
Table of Contents
- Step 1: Define Your Project Goals And Themes
- Step 2: Gather Relevant Visuals And Inspirations
- Step 3: Organize And Layout Your Moodboard
- Step 4: Select A Digital Or Physical Format
- Step 5: Refine And Finalize Your Moodboard
- Step 6: Present And Share Your Moodboard With Stakeholders
Quick Summary
| Key Point | Explanation |
|---|---|
| 1. Define project goals clearly | Articulate emotional responses and core messages to guide your design decisions effectively. |
| 2. Gather diverse visual inspirations | Collect visuals from various sources that meaningfully connect with your project themes for better representation. |
| 3. Organize visuals into a cohesive layout | Arrange gathered images thoughtfully to create a visual narrative that captures your project's essence clearly. |
| 4. Choose the right format for sharing | Select between digital or physical formats based on project needs, audience, and desired sensory experience. |
| 5. Present moodboard with a clear narrative | Effectively communicate your visual story, inviting feedback while emphasizing emotional connections behind your choices. |
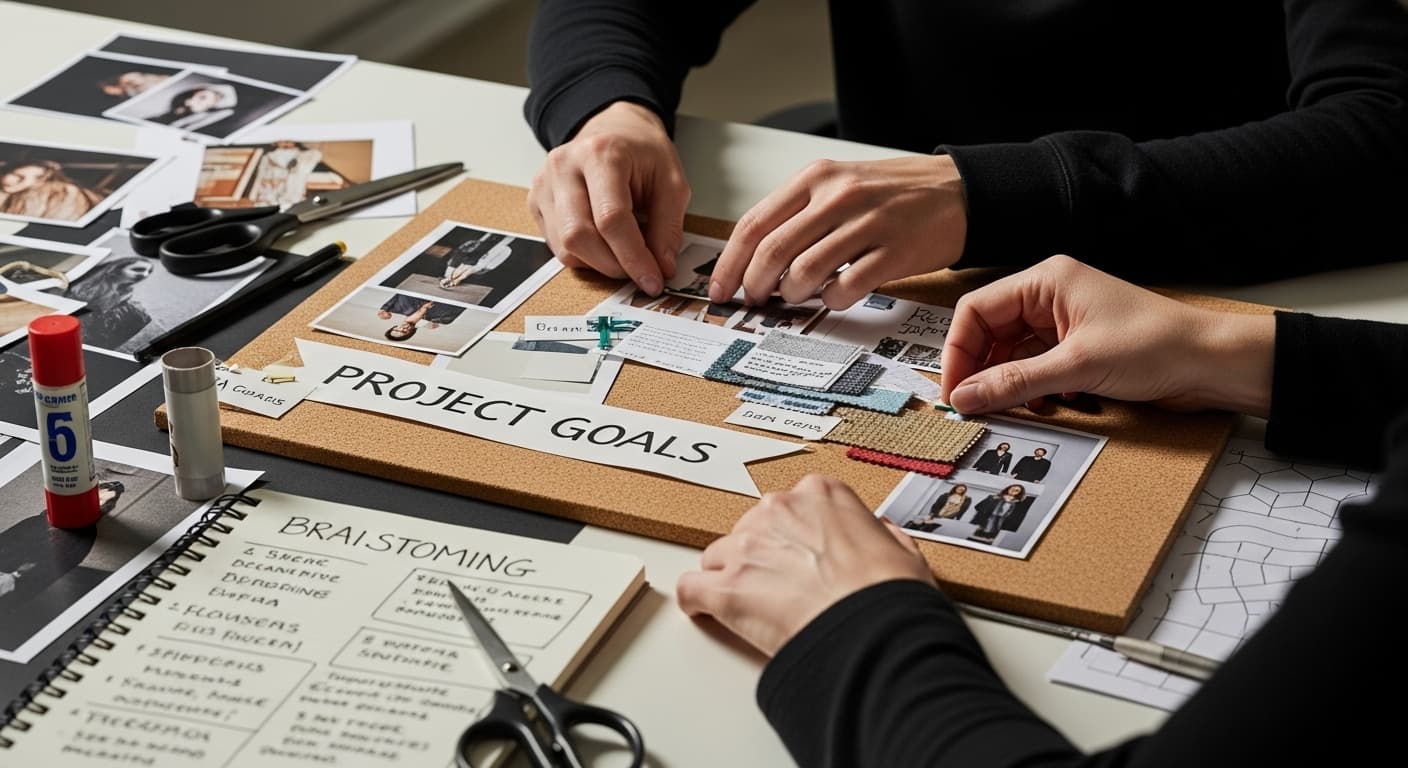
Step 1: Define Your Project Goals and Themes
Creating a powerful moodboard begins with a crystal clear understanding of your project's core vision and emotional landscape. Before diving into visual collection, you need to articulate the fundamental goals and thematic essence that will guide your entire creative process. This initial step transforms abstract concepts into a structured framework that will inform every subsequent design decision.
Start by sitting down and engaging in a focused brainstorming session about your project's fundamental objectives. Ask yourself critical questions: What emotional response do you want to evoke? What core message or feeling should your final design communicate? Whether you are designing a brand identity, planning a film aesthetic, or conceptualizing a marketing campaign, these initial reflections are crucial.
According to GeeksforGeeks, defining your idea visually requires having a clear preliminary concept. This means translating your abstract thoughts into concrete descriptive words that capture the project's spirit. For instance, if you are developing a wellness brand, your thematic descriptors might include serene, natural, minimalist, and rejuvenating.
![]() These words become your north star, guiding image selection and overall design direction.
These words become your north star, guiding image selection and overall design direction.
Consider creating a theme statement that encapsulates your project's essence in one or two sentences. This statement acts as a filter through which you'll evaluate every visual element you eventually add to your moodboard. It helps maintain consistency and prevents your creative vision from becoming scattered or unfocused.
As you define your goals, think beyond surface level aesthetics. Explore the deeper emotional and psychological landscape you want to create. Are you aiming for sophistication? Playfulness? Intensity? Each of these emotional territories will dramatically influence your visual choices, from color palettes to image styles and textures.
Remember that a well defined project goal is not just about appearance but about creating a meaningful connection with your intended audience. Your moodboard should ultimately serve as a visual communication tool that instantly conveys the heart of your creative concept.
Step 2: Gather Relevant Visuals and Inspirations
With your project goals and themes clearly defined, the next critical phase involves collecting visual materials that breathe life into your creative concept. This step transforms abstract ideas into tangible visual representations, serving as the foundational building blocks of your moodboard.
Begin by casting a wide net across multiple visual platforms and sources. Digital resources like Pinterest, Instagram, design blogs, and specialized websites offer treasure troves of inspiration. However, do not limit yourself to online resources. Physical magazines, art books, personal photographs, fabric swatches, and even random found objects can become powerful visual elements that capture your project's essence.
According to Study Rocket, effective visual research involves constantly observing your surroundings and maintaining a design journal where you can record emerging ideas. This means training your creative eye to see potential inspirations everywhere you look.
When collecting visuals, prioritize diversity and resonance over quantity. Each image should connect meaningfully with your previously defined project goals. Look for visual elements that communicate texture, color, emotion, and style. A single powerful image can often communicate more than several mediocre ones. Consider including:
- Photographs that capture specific moods
- Color palettes representing your project's emotional landscape
- Graphic design elements with relevant stylistic qualities
- Textural images that suggest material or sensory experiences
During this gathering phase, remain open and intuitive. Sometimes unexpected images can spark profound creative insights. Do not judge or limit your selections too quickly. Create a preliminary collection that feels expansive and exploratory, knowing you will refine and curate these materials in subsequent steps.
As you collect visuals, begin mentally organizing them into loose categories that align with your project themes. This initial sorting helps you understand which visual elements most powerfully communicate your creative vision. By the end of this step, you should have a robust collection of images that collectively suggest the emotional and aesthetic direction of your project.
Step 3: Organize and Layout Your Moodboard
After gathering a diverse collection of visual materials, the critical next step is transforming your raw inspiration into a cohesive, meaningful layout. Organization is where your moodboard transitions from a random collection of images to a powerful visual narrative that communicates your project's core essence.
Begin by spreading out all collected materials and creating an initial rough arrangement. This is not about perfection but about exploring visual relationships and discovering unexpected connections. Look for natural groupings that emerge organically among your images.
Some visuals might create visual dialogues with each other, suggesting harmonies or intentional contrasts that reinforce your project's themes.
According to Butler University's research guide, the layout should guide viewers through the content with clarity and intention. Consider developing a visual hierarchy where certain images serve as focal points while others provide supporting context. Your most powerful or representative images might occupy central positions, with complementary visuals creating a supportive visual ecosystem around them.
Technical considerations are crucial in this stage. Choose a consistent background color or texture that enhances rather than competes with your visual elements. White, neutral gray, or a muted tone often works best, allowing your images to stand out. Pay attention to spacing between images some breathing room helps each visual element maintain its individual impact while contributing to the overall composition.
Utilize digital tools like Canva or Adobe tools if you prefer a digital moodboard, or consider physical poster board and adhesive if you want a tactile, hands on approach. Digital platforms offer precise alignment and easy repositioning, while physical boards provide a more intuitive, organic arrangement process.
Your goal is creating a visual story that immediately communicates your project's mood and potential. Step back periodically and view your moodboard from a distance. Does it feel cohesive? Can someone unfamiliar with your project understand its emotional landscape just by glancing at the board? These questions will help you refine your layout.
Remember that your first draft is not final. Moodboard creation is an iterative process. Be prepared to move, remove, or replace images multiple times until the arrangement feels authentically aligned with your original project goals. The most compelling moodboards tell a story that feels both intentional and emotionally resonant.
Step 4: Select a Digital or Physical Format
Choosing the right format for your moodboard is a pivotal decision that can significantly impact how your creative vision is perceived and communicated. Both digital and physical formats offer unique advantages, and the best choice depends on your project's specific requirements, audience, and practical constraints.
Digital formats provide unprecedented flexibility and convenience. Platforms like Milanote, Pinterest, and Canva allow you to create, edit, and share moodboards with remarkable ease. These digital tools offer features like instant collaboration, quick image searching, and the ability to make real-time adjustments. They are particularly advantageous for remote teams, digital presentations, or projects that require frequent iterations.
According to research on design communication, digital mood boards are easier to create and share, making them ideal for projects with geographic or time constraints. They also allow for seamless integration with other digital design tools and presentations.
Physical moodboards, on the other hand, offer a tangible, sensory experience that digital formats cannot replicate. Tactile creativity comes alive when you physically arrange images, fabric swatches, and other materials. This format is particularly powerful for projects in fields like interior design, fashion, and spatial planning, where texture and physical presence matter deeply.
When selecting your format, consider these key factors:
- Project purpose and intended audience
- Need for physical texture and material exploration
- Collaboration requirements
- Budget and time constraints
- Presentation environment
Hybrid approaches are also increasingly popular. You might create a physical moodboard for initial conceptualization and then digitize it for broader sharing and collaboration. Some professionals even create complementary digital and physical versions to leverage the strengths of both formats.
Ultimately, the most effective moodboard is one that most authentically communicates your creative vision.
Here is a comparison table summarizing the main features, pros, and cons of digital versus physical moodboards to help you select the best format for your project.
| Format Type | Advantages | When to Use | Potential Drawbacks |
|---|---|---|---|
| Digital | Easy to create, edit, and share; real-time collaboration; integrates with design tools | Remote teams, frequent updates, digital presentations | Less tactile, may lack physical texture |
| Physical | Tangible, sensory experience; hands-on creativity; highlights material and texture | Fashion, interior design, projects needing material exploration | Harder to share remotely, less flexible |
| Hybrid | Combines tactile experience with easy sharing; versatile | Initial concept with in-person work and remote sharing | Time-consuming to maintain two formats |
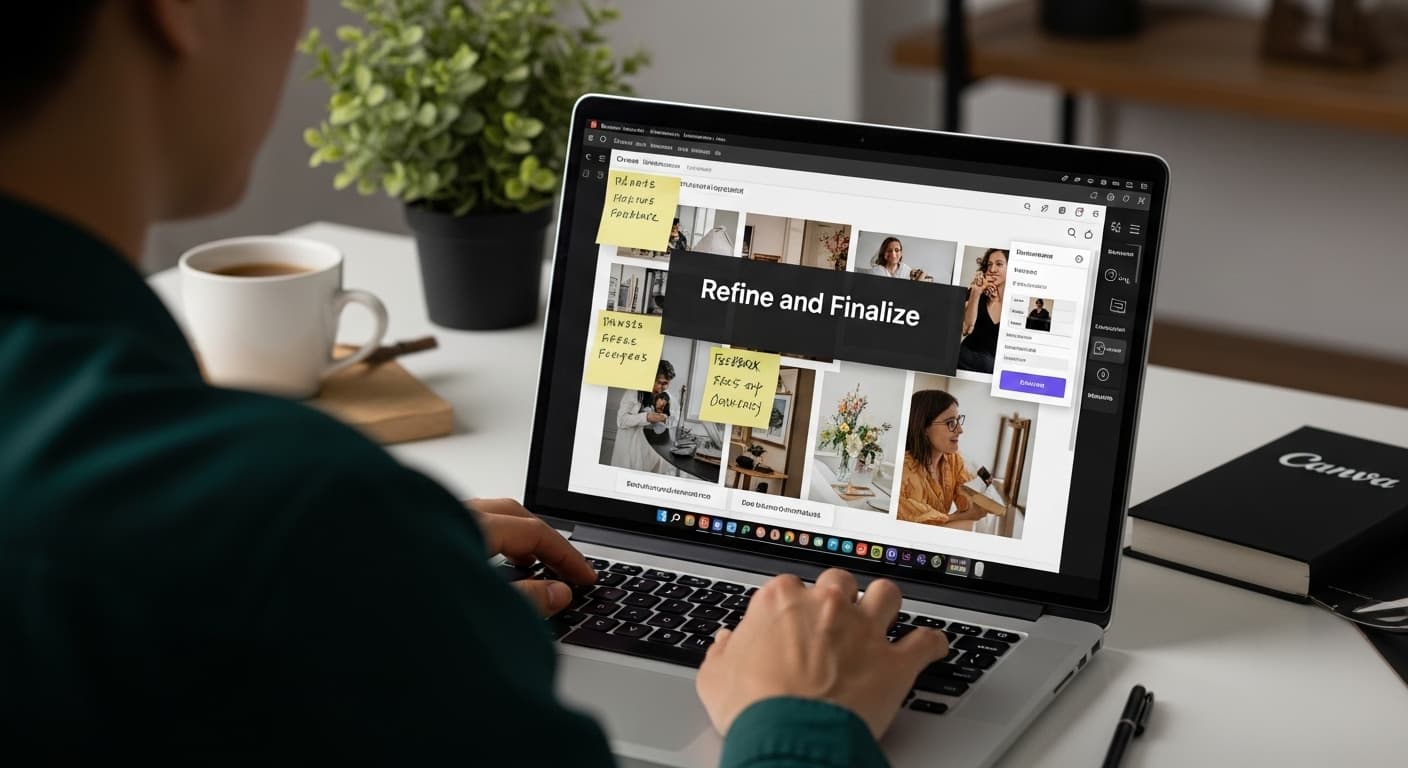
Step 5: Refine and Finalize Your Moodboard
Refinement represents the crucial transition between a promising concept and a polished, professional visual narrative. This final stage transforms your initial creative exploration into a precise, impactful communication tool that articulates your project's core vision with clarity and emotional resonance.
Begin by stepping back and viewing your moodboard with fresh, critical eyes. The goal is not perfection but authentic representation. Ask yourself probing questions: Does this visual composition truly capture the emotional landscape of your project? Are there images that feel disconnected or unnecessary? Sometimes, removing elements can be more powerful than adding them.
Careful curation is key. Each visual element should serve a deliberate purpose, contributing to the overall narrative without creating visual noise. Look for subtle connections between images colors that echo each other, textures that create visual dialogue, or thematic undertones that reinforce your project's core message.
Color harmony becomes particularly important during refinement. Examine how different visual elements interact chromatically. A cohesive color palette can transform a collection of disparate images into a unified, compelling story. Consider desaturating or adjusting image tones to create a more harmonious visual experience.
Technical considerations matter significantly in this stage. Ensure consistent image quality, alignment, and spacing. If working digitally, use grid systems or alignment tools to create precision. For physical moodboards, measure and adjust image placement carefully. Uneven or haphazard layouts can undermine even the most compelling visual narrative.
Seek external perspectives to validate your work. Share your moodboard with trusted colleagues, mentors, or peers who can provide objective feedback. Their fresh viewpoint might reveal subtle nuances or potential improvements you might have overlooked. Be open to constructive criticism while remaining true to your original creative vision.
Consider creating multiple versions of your moodboard, each subtly different. This approach allows you to explore variations and select the most effective iteration. Some creators find value in creating alternate layouts that emphasize different emotional aspects of the same project.
The final test of a successful moodboard is its ability to communicate instantaneously. When someone unfamiliar with your project views the board, they should immediately grasp its emotional essence, core themes, and creative direction. If your moodboard achieves this level of immediate, intuitive communication, you have successfully transformed your initial inspiration into a powerful visual storytelling tool.
The following checklist table provides a concise set of criteria to help you verify your moodboard is ready for final presentation.
| Criteria | Description | Complete (Yes/No) |
|---|---|---|
| Visual Cohesion | Board communicates a unified emotional and aesthetic direction | |
| Purposeful Image Selection | Every visual element contributes to the project narrative; irrelevant items removed | |
| Color Harmony | Consistent, harmonious palette used across images | |
| Technical Polish | Alignment, spacing, and image quality are consistent and professional | |
| Stakeholder Feedback Incorporated | Moodboard has been reviewed and adjusted based on stakeholder or peer feedback | |
| Ready for Presentation | Board is fully assembled in its chosen format and ready to share with the intended audience |
Step 6: Present and Share Your Moodboard with Stakeholders
Presenting your moodboard marks the culmination of your creative journey, transforming a personal vision into a collaborative dialogue. This step is about effectively communicating your creative concept, inviting feedback, and generating meaningful engagement with your project's core narrative.
Prepare for your presentation by developing a clear narrative framework that guides stakeholders through your visual story. Think of your moodboard as a visual language each image is a word, and your arrangement creates a complete sentence. Be ready to articulate why specific images were chosen and how they collectively represent your project's emotional and conceptual landscape.
According to the Center for Architecture, sharing mood boards is fundamentally about conveying design ideas and gathering constructive feedback. This means creating an environment where stakeholders feel comfortable providing honest, substantive responses.
Choose your presentation platform strategically. Digital platforms like Zoom, Microsoft Teams, or Google Meet offer flexibility for remote presentations. For in-person meetings, consider large-format printing or high-quality digital displays that showcase your moodboard's intricate details.
When presenting, focus on storytelling rather than technical explanation. Walk your audience through the emotional journey represented by your visual selections. Explain the thought process behind your choices, highlighting how each image contributes to the overall narrative. Use engaging language that invites curiosity and dialogue.
Anticipate and welcome questions. Stakeholders will likely be interested in understanding:
- The emotional intent behind your visual choices
- How the moodboard connects to broader project objectives
- Potential variations or alternative interpretations
- Specific design inspirations represented in the images
Be prepared for constructive criticism. Not every stakeholder will interpret your moodboard identically, and diverse perspectives can reveal nuanced insights you might have overlooked. Approach feedback with openness and curiosity, viewing it as an opportunity for refinement rather than a challenge to your creative vision.
Following the presentation, document any significant feedback or suggestions. This allows you to potentially iterate on your moodboard, ensuring it continues to evolve and accurately represent the project's developing vision. Remember, a great moodboard is not a static artifact but a dynamic communication tool that captures the essence of creative potential.
Transform Your Moodboards into Full-Fledged Videos with Palmedor.ai
Feeling stuck turning your creative vision into finished video content? If you have spent time refining moodboards to capture the emotional essence and narrative of your project, the next step can often feel overwhelming. Taking your visuals from a moodboard to an engaging video is challenging, especially if you lack technical expertise or want a professional result without the hassle.
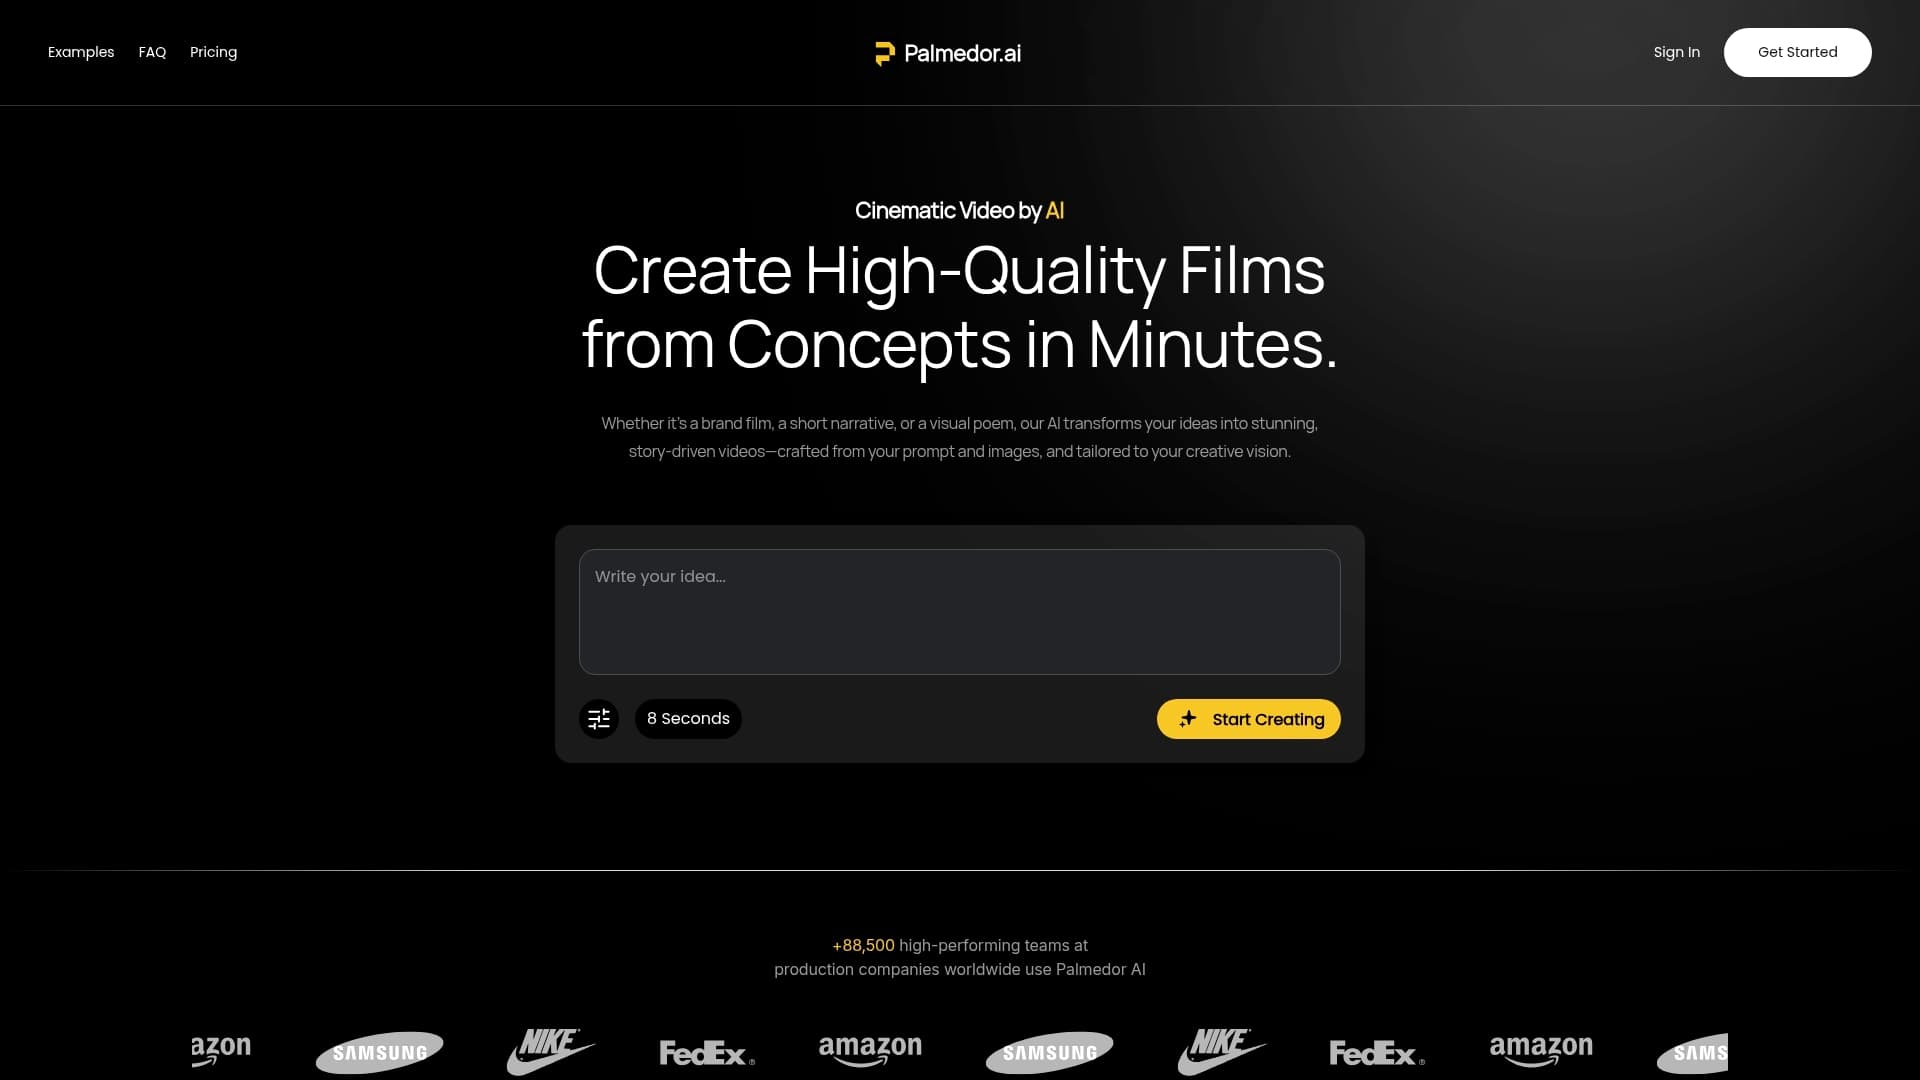
Let Palmedor.ai bridge the gap between inspiration and execution. Our AI-powered video creation platform takes your concepts, images, and moodboards to produce cinematic videos with minimal effort. Simply describe your idea or upload your references and watch Palmedor.ai generate scripts, design scenes, and customize output formats for you. Experience how easy it is to turn your creative roadmap into brand films or shareable social clips. Start your next project at Palmedor.ai and see your moodboard come to life in minutes.
Frequently Asked Questions
How do I start creating a moodboard?
To begin creating a moodboard, define your project goals and themes by brainstorming the emotional responses and messages you want to convey. This foundational step will guide your design decisions throughout the process.
What types of visuals should I include in my moodboard?
Include a diverse array of visuals such as photographs, color palettes, graphic design elements, and textures that resonate with your project's themes. Prioritize images that meaningfully connect with your project's core essence.
Should I create a digital or physical moodboard?
The choice between digital and physical moodboards depends on your project's needs. Digital moodboards offer flexibility and ease of sharing, while physical boards provide a tactile experience that can be beneficial for certain creative fields like fashion and interior design.
How can I refine my moodboard before presenting it?
To refine your moodboard, take a critical look at it and ensure that each visual element contributes to a cohesive narrative. Remove any images that feel disconnected, and maintain a harmonious color palette to strengthen the overall composition.