Create Video With Script: Step-by-Step Guide for Creators
Learn how to create video with script using Palmedor.ai. Discover a step-by-step process for turning scripts into cinematic videos with professional results.
Create Video With Script: Step-by-Step Guide for Creators

Most American creators agree that the difference between an average video and a captivating one often comes down to planning. With so many tools and techniques available, even seasoned professionals can feel lost in the details. By mastering a streamlined workflow from script to final export, you can take full control of your creative process and ensure your next video stands out. Nearly 85 percent of American marketers say detailed preparation leads to better video results.
Table of Contents
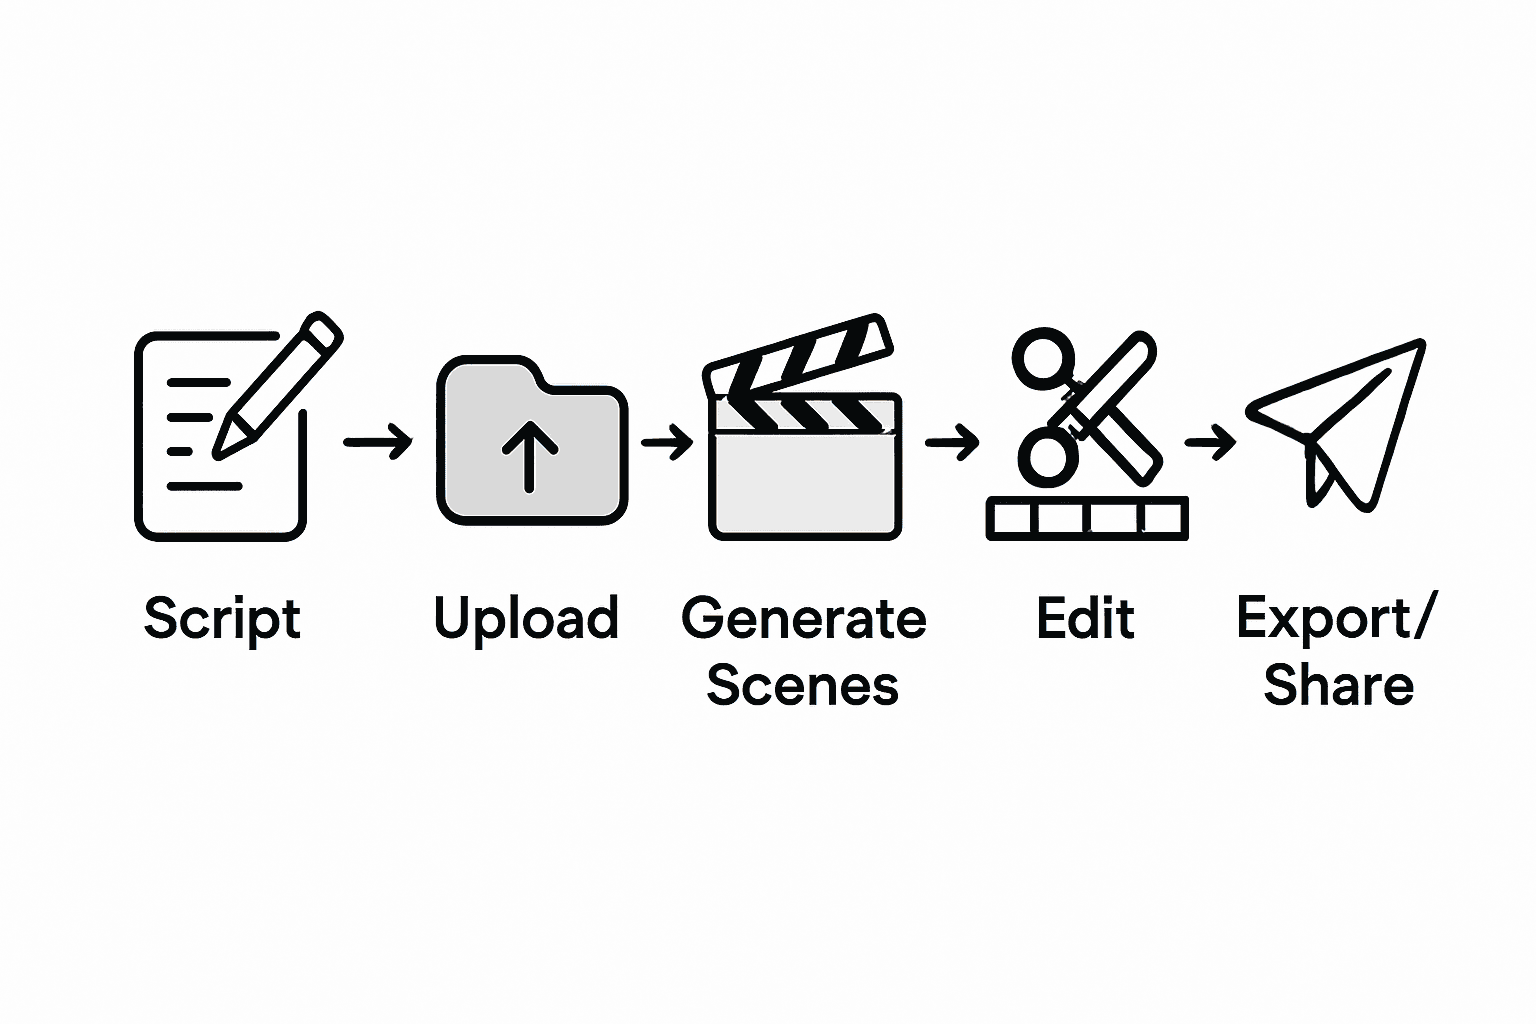
- Step 1: Prepare Your Script And Visual References
- Step 2: Upload Content And Select Video Settings
- Step 3: Generate Scenes And Customize Elements
- Step 4: Preview, Edit, And Refine Your Video
- Step 5: Export And Share The Final Cinematic Video
Quick Summary
| Essential Insight | Explanation |
|---|---|
| 1. Develop a Clear Script Outline | Begin with a detailed script that includes dialogue, actions, and scene descriptions for effective video storytelling. |
| 2. Gather Diverse Visual References | Collect a variety of visual inspirations, including stock images, personal photos, and sketches to support your storyline. |
| 3. Organize and Upload Media Files | Systematically upload your media files, ensuring compatibility with your video platform and paying attention to formats and sizes. |
| 4. Customize Scenes with Detail | Use advanced video tools to transform your script into visual scenes, focusing on lighting, angles, and authentic character interactions. |
| 5. Review and Refine Before Exporting | Carefully examine each scene for flow, timing, and quality, making small adjustments to elevate your final video. |
Step 1: Prepare Your Script and Visual References
Creating a compelling video starts with strategic script and visual preparation. The process involves crafting a narrative blueprint and gathering visual inspiration that will guide your entire production workflow, transforming abstract ideas into a concrete visual story.
Begin by developing a clear script outline that breaks down your narrative into logical scenes and sequences. Modern scriptwriting tools like ScriptViz can help retrieve visual references directly aligned with your written content, making the connection between words and imagery seamless. Your script should include dialogue, action descriptions, and specific scene details that provide a comprehensive roadmap for your video creation.
Pro tip: When collecting visual references, aim for diversity. Mix professional stock imagery, personal photographs, sketch concepts, and mood board elements to create a rich visual landscape that supports your script's emotional tone. Screenshots from films, architectural images, color palettes, and even abstract art can spark creative connections and help your video team understand the precise visual aesthetic you want to achieve.
Once your script and visual references are assembled, you are ready to move forward to the next critical stage of video production: scene and character development.
Step 2: Upload Content and Select Video Settings
With your script and visual references prepared, it is time to bring your video project to life by uploading your content and configuring the right video settings. This crucial stage determines how your visual story will be processed and ultimately presented.
Start by selecting and uploading your media files systematically. Organize your files in a logical sequence matching your script outline, ensuring compatibility with the video creation platform. Pay close attention to file formats like MP4, AVI, or MOV, and check the maximum file size allowed. Some platforms have specific resolution and aspect ratio requirements, so verify these details before uploading to prevent potential compatibility issues.
Pro tip: Always have backup copies of your original files stored in a separate location. When selecting video settings, consider your intended distribution platform social media, professional presentations, or streaming services each with unique optimal settings for resolution, frame rate, and compression. Take time to preview your uploads and adjust settings to maintain the highest possible visual quality while ensuring smooth playback across different devices and internet connection speeds.
Once your content is uploaded and settings are configured, you are ready to move into the next exciting phase of video production: scene composition and editing.
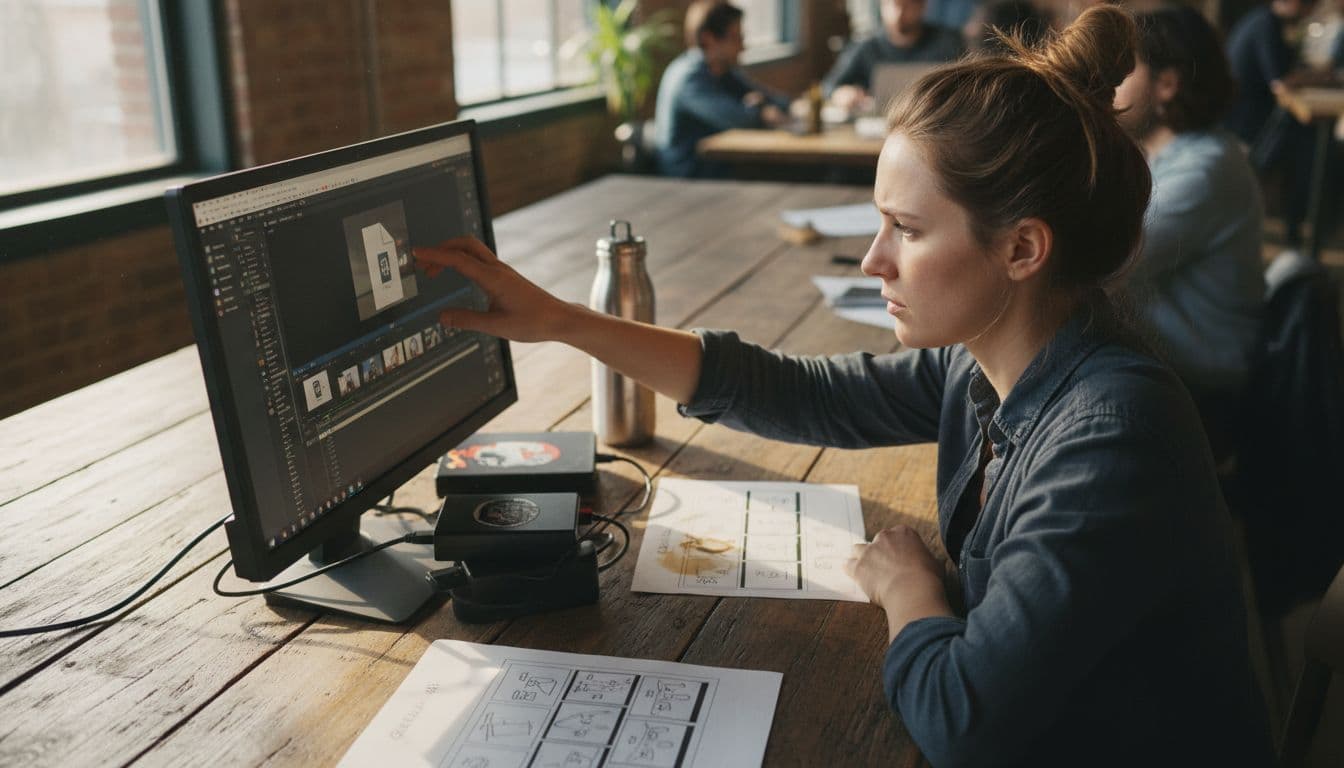
Step 3: Generate Scenes and Customize Elements
With your initial content uploaded, you are now entering the creative heart of video production where your script transforms into visual storytelling. This stage is where imagination meets technological innovation, turning your conceptual blueprint into a dynamic visual narrative.
Leverage advanced video diffusion models that can generate step-by-step visual instructions based on your textual input. These intelligent systems allow you to customize scenes with remarkable precision, translating your written descriptions into rich, contextually appropriate visual elements. Focus on providing clear, detailed descriptions that capture the emotional tone, character interactions, and specific visual aesthetics you want to achieve. Pay attention to lighting, camera angles, character positioning, and background details to ensure each scene feels authentic and aligned with your original creative vision.
Pro tip: When customizing visual elements, think of each scene as a miniature story within your larger narrative. Interactive visualization techniques can help you fine-tune each component, allowing you to experiment with different visual approaches until you find the perfect representation. Don't be afraid to iterate multiple times small adjustments can dramatically enhance the overall impact of your video.
Once you have generated and customized your scenes, you are ready to move into the final refinement stage: reviewing and making final edits to your video project.
Step 4: Preview, Edit, and Refine Your Video
With your scenes generated, you now enter the critical stage of video refinement where your raw creative vision transforms into a polished final product. This phase is about precision, attention to detail, and ensuring every element of your video communicates exactly what you intended.
Carefully review each scene, examining the visual flow, timing, transitions, and overall narrative coherence. Pay close attention to audio synchronization, color grading, and the emotional impact of each sequence. Most advanced video platforms offer frame-by-frame editing capabilities that allow you to make microscopic adjustments. Look for moments where scene pacing feels unnatural, audio levels need balancing, or visual elements could be more dynamically arranged.
Pro tip: Create multiple preview versions of your video. Watch each iteration with fresh eyes, ideally after taking a short break to reset your perspective. Listen to feedback from trusted colleagues or test audiences, but remain true to your original creative vision. Small refinements often make the difference between a good video and an exceptional one. Trust your artistic instincts while remaining open to constructive input that can elevate your final product.
Once you are satisfied with your edits and refinements, you are ready to export and share your completed video project with the world.
Step 5: Export and Share the Final Cinematic Video
You have reached the final stage of your video creation journey where your meticulously crafted project transforms from a creative vision into a shareable masterpiece. This moment represents the culmination of your artistic and technical efforts, ready to connect with your intended audience.
Upload your video systematically, selecting the optimal export settings that preserve your video's visual and audio quality. Choose file formats that balance high resolution with reasonable file size such as MP4 or MOV. Pay attention to resolution settings 1080p for standard high definition or 4K for premium quality ensuring your video looks crisp across different viewing platforms. When preparing to share your content, consider adding descriptive captions and detailed metadata that will help viewers understand and discover your work.
Pro tip: Before final distribution, conduct a comprehensive preview on multiple devices smartphones, tablets, desktop computers to verify visual consistency and playback quality. Consider creating platform specific versions that are optimized for different social media channels or streaming services. Each platform has unique compression algorithms and display requirements that can subtly impact your video's appearance.
With your video exported and ready, you are now prepared to share your creative vision with the world and engage your target audience.
Streamline Your Video Creation Journey With AI-Powered Precision
The step-by-step guide on creating videos with scripts highlights common challenges like organizing scenes, managing diverse visual elements, and perfecting edits to deliver cinematic quality. If you have ever struggled with translating your narrative blueprint into professional-grade video content without the hassle of complex tools then this is your solution. Palmedor.ai offers a seamless platform where AI assists with script generation, scene composition, and smart presets to turn your ideas into polished videos fast with minimal effort. Key pain points such as visual coherence, editing refinement, and output customization are addressed with intuitive technology designed for creators like you.
Take control of your video projects today and enjoy benefits like:
- Automated scene generation based on your script details
- Flexible output formats optimized for any platform
- Easy integration of audio, cast descriptions, and moodboards
Ready to eliminate time-consuming steps and empower your creativity with cutting-edge AI tools Visit Palmedor.ai and explore how you can create stunning cinematic videos effortlessly. Don’t wait Let your story come to life with professional impact by starting your free trial now at Palmedor.ai Video Creation Platform. For a guided experience see the Step-by-Step Guide for Creators and begin your transformation today.
Frequently Asked Questions
How do I create a video script?
To create a video script, start by outlining your narrative into logical scenes and sequences. Break down your ideas into dialogue, action descriptions, and scene details to guide your production flow effectively.
What should I include in my video visual references?
Include a variety of visual references such as stock images, personal photographs, sketches, and mood board elements. This diversity helps create a visual landscape that aligns with the emotional tone of your script.
What video settings should I consider when uploading my content?
When uploading your content, pay attention to file formats, resolution, and aspect ratio requirements specific to your video creation platform. Organize your files to match your script outline for a smoother upload process.
How can I refine my video after generating scenes?
Review each scene for visual flow, timing, and transitions while ensuring audio synchronization. Consider creating multiple preview versions to gather feedback and make adjustments to enhance your video's overall impact.
What are the optimal export settings for my final video?
Choose export settings that balance high resolution with reasonable file size, such as MP4 or MOV formats. Set the resolution to 1080p for standard high definition or 4K for premium quality to ensure your video looks sharp across different devices.
How do I distribute my finished video effectively?
Prepare to share your video by adding descriptive captions and detailed metadata. Conduct a comprehensive preview on multiple devices to verify playback quality, and consider creating platform-specific versions for optimized viewing.